


Explosion-Proof Air Conditioner Installation Requirements: A Step-by-Step Guide
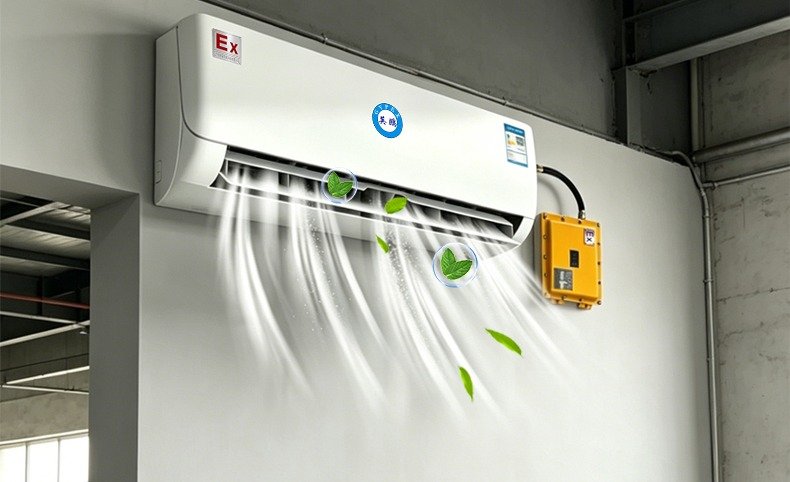
An explosion-proof air conditioner protects a room where flammable gas or dust may appear. A careless installation can defeat that protection. Consequently, installation rules are strict and site-specific. This guide explains the explosion-proof air conditioner installation requirements for typical hazardous-area projects. First, we cover classification and permits. Then we walk through mounting, wiring, refrigerant lines and final testing. Overall, this gives you a complete installation checklist before your contractor starts work.
Step 1: Confirm the Area Classification
Every installation starts with the area classification. The site owner must define the zone, gas group and temperature class. For gas atmospheres, IEC 60079 defines Zones 0, 1 and 2. The European ATEX framework applies Directive 2014/34/EU to equipment placed on the EU market. In North America, the NEC Class I Division system often applies instead. Moreover, the IECEx scheme certifies equipment internationally against the same standards.
Ask for the hazardous area drawing before you plan anything. This drawing shows the zone boundaries on a site map. Then locate your room within the drawing. In addition, record the flammable substance present. For example, hydrogen, ethylene and propane all demand different equipment. Moreover, note the ventilation method. Natural ventilation versus forced ventilation can change the classification outcome. Therefore, gather this information early.
Check the equipment marking against the area classification. The unit must match the zone, gas group and temperature class. For example, a Zone 2 unit is not automatically acceptable in Zone 1. Similarly, a T4-rated unit cannot serve an area that requires T3 or better. Therefore, confirm all markings before you order the unit or plan any explosion-proof air conditioner installation work. In addition, keep a copy of the certificate at the site. Inspectors will ask for it.
Step 2: Survey the Room and Calculate the Heat Load
Measure the room before you select the unit. Record the floor area, ceiling height and insulation level. Then list the heat sources inside. People, lighting, motors and control cabinets all add heat. Therefore, use a documented heat-load calculation rather than a rough guess. Many suppliers offer a free sizing worksheet. In fact, an undersized unit runs constantly and fails early. In contrast, an oversized unit short-cycles and wastes energy.
Also check the ambient conditions. Desert plants and rooftop locations may require a high-ambient model. Coastal and chemical sites need corrosion protection on the enclosure. Furthermore, confirm the available power supply. Common options include 220V, 380V and 440V in 50 Hz or 60 Hz versions. Match the unit nameplate to your supply before delivery. Consequently, you avoid expensive field conversions.
Choose the right product family at this stage. For control rooms and operator shelters, a wall-mounted explosion-proof air conditioner is usually the cleanest fit. For larger process buildings, a cabinet unit delivers more capacity from one footprint. Our Explosion-Proof Air Conditioner Guide 2026 explains the selection logic in more detail.
Step 3: Mounting Position and Clearance
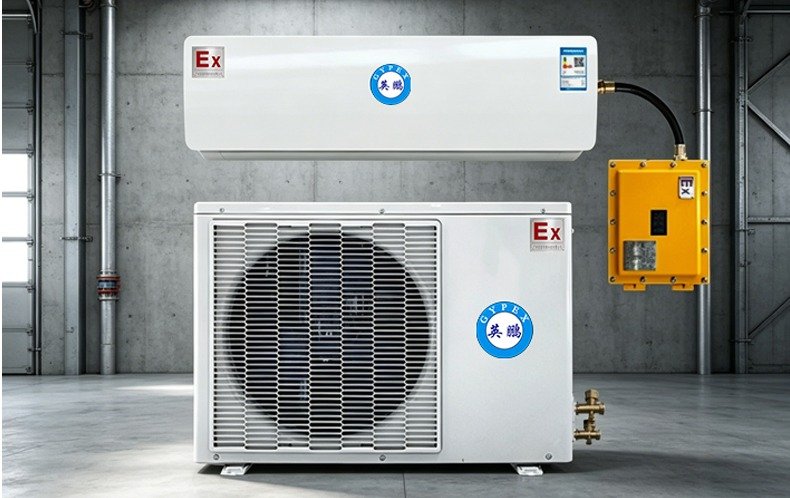
Mounting position affects both performance and safety. Keep the unit away from known gas release points. Also avoid corners where airflow short-circuits between the inlet and outlet. Follow the manufacturer clearance values precisely. Typically, these values range from 300 mm to 600 mm around the unit. In addition, the mounting bracket must carry the full operating weight. Use stainless or coated fixings in corrosive atmospheres. Importantly, leave enough space for filter access and service panels.
Consider the airflow path through the room. Position the supply air toward the main heat sources. Meanwhile, keep the return air free of obstructions. For wall-mounted units, check the wall structure first. Concrete and steel frames work best. In contrast, lightweight partitions may require extra bracing. Consequently, always verify the wall rating before drilling. Moreover, protect the electrical connections from mechanical damage. Route cables in approved conduits and glands.
Step 4: Electrical Connections and Ex Wiring
Electrical work demands a certified electrician. Use only approved cable glands and junction boxes. In Zone 1, flameproof (Ex d) enclosures must remain intact. Therefore, never drill extra holes in certified enclosures. Follow the wiring diagram supplied with the unit. Then check earth continuity and insulation resistance. Moreover, install an approved isolator close to the unit. This gives maintenance crews a safe disconnection point.
Pay attention to cable entry details. Each gland must match the cable diameter and the enclosure type. In addition, unused entries need certified blanking plugs. Furthermore, label every cable and terminal clearly. A neat panel speeds up inspections and future fault-finding. In short, treat the electrical side with the same care as the mechanical side. Notably, incorrect gland selection is a common cause of failed audits. In fact, these four steps form the basis of every explosion-proof air conditioner installation requirement.
Step 5: Refrigerant Lines and Leak Testing
Refrigerant piping must stay sealed from the classified atmosphere. Use brazed or welded joints wherever possible. Flare connections require correct torque and a leak test. In addition, keep pipe runs short to protect cooling capacity. Insulate suction lines to prevent condensation drips. Then pressure-test the circuit with dry nitrogen. Finally, evacuate the system and charge the exact refrigerant stated on the nameplate. After charging, sweep every joint with an electronic leak detector.
Do not skip the standing pressure test. Leave the system under nitrogen pressure for at least 24 hours. Then record the readings in the commissioning report. Notably, small leaks cause big problems later. They reduce capacity and allow moisture into the circuit. Consequently, they shorten compressor life. Therefore, invest the time in a thorough leak test before handover. In addition, keep a copy of the charging log in the maintenance file.
Step 6: Commissioning and Documentation
Commissioning proves the system works as designed. Run the unit through cooling, heating and standby modes. Check supply air temperature against the specification. Then verify condensate drainage and alarm outputs. In addition, confirm any remote monitoring signals. Keep all documents in the maintenance file. These include the certificate, wiring diagram, test results and the area classification study. Consequently, future inspections become faster and cheaper.
Train the operators before handover. Show them the isolator, the reset procedure and the alarm codes. Moreover, schedule the first service visit. A check after the first month catches early problems. In short, good documentation protects your investment for years.
Common Installation Mistakes to Avoid
Some mistakes repeat on every project. First, ignoring the hazardous area drawing. Crews position units near vents or release points. Consequently, inspectors reject the installation. Second, using standard cable glands in Ex zones. This mistake appears often in contractor work. Therefore, specify certified glands in the purchase order. Third, skipping the standing pressure test. A fast nitrogen test misses slow leaks. In addition, poor documentation delays permits. Consequently, plan the paperwork from day one.
Another common error is undersizing the power supply. The unit nameplate shows the running and starting current. Therefore, size the breaker and cable for the starting current. Moreover, leave spare capacity for future units. In addition, confirm the phase balance on three-phase supplies. Consequently, your explosion-proof air conditioner installation passes inspection the first time. Notably, this checklist covers every explosion-proof air conditioner installation requirement that auditors check.
Buyer Checklist for Explosion-Proof Air Conditioner Installation
- Confirm the zone, gas group and temperature class before ordering.
- Match the certificate marking to the area classification.
- Calculate the heat load with a qualified engineer.
- Verify wall strength and mounting clearances.
- Use certified cable glands and Ex-rated junction boxes.
- Pressure-test and leak-test the refrigerant circuit.
- Keep certificates, drawings and test reports on site.
- Schedule a certified inspection after installation.
FAQ
Who can install an explosion-proof air conditioner?
Only trained, certified personnel should handle Ex equipment. For example, wiring and enclosure work requires an electrician familiar with IEC 60079. In short, hire a contractor with documented hazardous-area experience.
Can I convert a standard air conditioner for hazardous use?
No. Conversion invalidates the certification and creates legal risk. Therefore, always buy factory-certified units for classified areas.
Do I need a permit for the installation?
Usually yes. Most plants require a work permit plus an electrical permit. Consequently, prepare the documentation before mobilizing the crew.
Can I complete the explosion-proof air conditioner installation myself?
No. Certified personnel must handle the electrical and refrigerant work. Therefore, hire a trained team. In addition, keep the inspection reports for the site file.
Planning an explosion-proof air conditioner installation? Talk to LONTU with your area classification and heat load. Our engineers will confirm the right certified unit and provide installation guidance. For quotations and drawings, email sales@blockchain-miner.com.